1. Their Logo on the cover
2. The prefolds are the bottom, tan diapers that have the Econobum tag on them. They are unbleached which is why they are this color. The kit came with 12 of these. I'll adress the white ones on top in a few minutes.
3. The water proof outer cover. 3 came in the kit. The nice thing about these is that the inside is slick plastic so if she pees I can just wipe them down and re-use them. Sometimes she doesn't even soak all the way through the cloth diaper. I wash these only after several uses or if there were to ever get any poop on them. Notice all the snaps on the top, front section. Those are to adjust the size as she grows. It only comes in white which is only a small disadvantage. Right now I'm more concerned with the price fitting my budget than having cute colorful diapers. Right now being the operative two words...
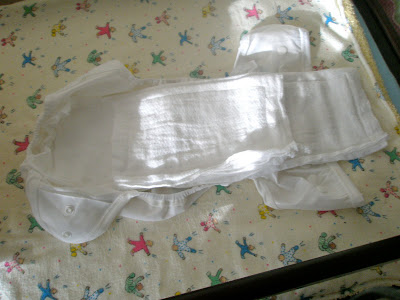
4. This is what it looks like together - prefold folded in thirds and then laid flat into the cover. Then just put baby on it and snap it up! Easy breezy!
The next few photos are of things I've made myself. I've made a total of 2 fitted diapers which are basically a cloth diaper that fits like a disposable diaper. It needs a water-proof cover because it will soak through. I've made one with a soaking pad sew into the middle and then I made a pocket diaper that I can insert a soaker pad to add for more absorbancy. I've also made several soaker pads from Gerber Birdseye cloth diapers that I folded into fourths and hemmed the edges so they would stay together. I made large ones and small ones.
1. This is the first diaper I sewed with my mom. I already posted pictures of these on my Facebook. This one has velcro to keep it fastened and I sewed the soaker pad inside. I made this out of 2 flannel receiving blankets that were too small for Brooklyn, even as a new born.
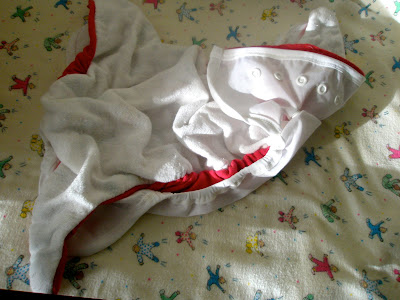
2. This is the second fitted diaper I made. This one I made at my grandma Ross' house. I used an old red t-shirt, a flannel blanket and one birdseye cloth diaper for the 4 layers. This one took a little longer because I did all the sewing on the diaper itself. My grandma showed me how to use the machine. I messed up a lot! This one is a pocket diaper that you can insert the soaker pads (as many as you think you need). It does not have velcro so I would need pins or a snappi if I wanted to use it without a water-proof cover (which I won't be doing). I show the diaper and how to insert the soaker pad
^^^ Putting the soaker pad in. You could also put a prefold diaper in there as well.
^^^^^
What it looks like all closed up -- you can tell the the outer flaps were where the sleeves once were!
In the diaper cover (how she will wear it) -- see how it fits perfectly?? :)
3. These are the soaker pads that we made out of the Gerber birdseye cloth diapers. The way they come, they are very thin cloth diapers that aren't super sturdy. But they're great for making soaker pads like this or using as burp cloths too. I used them to make soaker pads and I think they came out very well.
I made long ones (top) and short ones (bottom) because they were too long if I didn't cut off the smaller portion. I figured the smaller ones can be added as a booster for extra absorbancy in the middle of the diaper at night or even during the day.
4. The Econobum diaper cover with my soaker pads in it
She has worn this combination several times already. I put one long soaker and one small soaker in the cover and then snap her up as tight as possible. I've not had a single leak and she can go around 2-3 hours in one of these (which I thought was pretty good!). I haven't let her go longer then that just because I worry about leaking and don't want that to happen.
This is a very cheap, easy to do cloth diapering method and I'm really proud of myself for sticking with it and doing this. I haven't had to by any fabric yet to make any of this. I have only had to buy the elastic, string, velcro and some good scissors to cut fabric. I still have plenty of flannel receiving blankets to use and TONS of old t-shirts we won't be wearing. I'm looking forward to making lots more of my own diapers and eventually being good enough to make some cute ones.
I'm currently waiting for my Sun Baby AIO diapers to come in that I ordered from eBay. They are very well priced and have gotten good enough reviews from the mom's who have used them. You can argue the price - 10 for $60 - that's a steal for AIO diapers. I can't wait to get them. They are coming from China though so it's taking a while. I am expecting to get them this week sometime.
Tomorrow I will be going back to my grandma's house to sew a new pattern I got from another mom on baby center. I'm looking forward to it. It looks a lot like a popular brand of fitted AIO's that I love but can't afford so I'm hoping to be able to do this pattern some justice! I will definitely post pictures when I finish some. I also want to post a video sometime of me sewing one so you can see me in action. I'm sure some of my family members are really wondering just what that looks like...lol
Well, I hope you all enjoyed seeing the fruits of my labor and how different cloth diapering has come since the "olden days" of when I was cloth diapered. I hope to be able to cloth diaper all my kids and save lots of money since I plan on having 4. Yikes!


4 comments:
YAY for you on the cloth diapering!!! I did it with Nathan and stuck it out. But there were no such thing as all of the cute cloth diapers you see now. Good for you sewing your own. You will save a TON of money this way! Now, we need to see a pic of Brooklynn IN one of the diapers!
Thanks Sandi! The next step is showing Brooklyn off in one. I always forget when I'm changing her diaper to take a picture. I'm going to try to remember tomorrow. Cloth diapering has come a long way. I had no idea there were so many options. It was overwhelming at first! Then I just had to eliminate certain ones based on how expensive they were which made it a LOT simpler. :)
Thank you for this post! I'm about to start making my own cloth diapers with very little understanding on how the whole cloth diapering thing works. :) Your post helped me understand a bit better. Thanks!
So cool! I knew that cloth diapering had changed a lot and had seen some pictures of some them, but I've learned some new info from you. Great job on the sewing! Looks like it's going well!
Post a Comment